Getting started with our web IDE
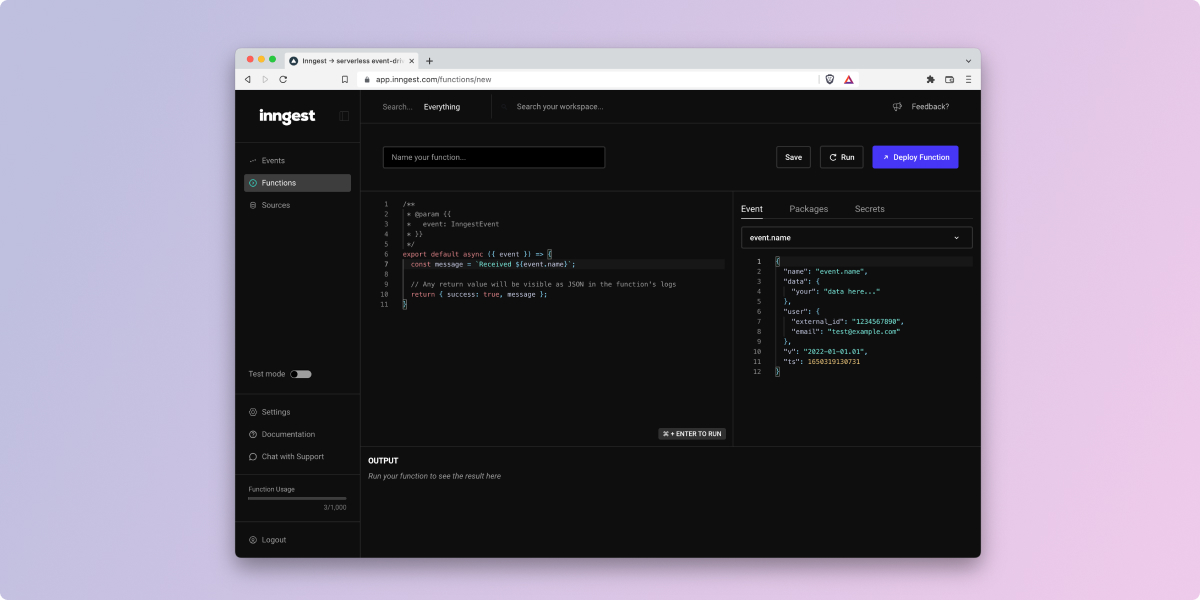
Our team has set out to build a new way to build, confidently test and ship serverless functions triggered by events, so I'm very happy to share our first take on doing this right from your browser. While most developers will likely prefer their own environment and using our cli, we think our new web IDE will enable developers to get a feel for the benefits of the Inngest platform very quickly and ship less complex serverless functions.
How does Inngest work?
Inngest is a platform for event-driven serverless functions. You can send event data to Inngest from anywhere through our built in integrations like Github or Stripe, anything that supports webhooks or directly from your application with our API. Inngest immediately runs your functions when events are received, allowing your to easily scale to any level of throughput without the overhead.
Creating your first function
To build and ship your first function with Inngest you only need to know what event you want to trigger your event and what you want it to do. For this example, we'll use the example of posting a Slack message to a channel when your Stripe account has a new invoice successfully paid. A little virtual pat-on-the-back for your sales team.
Using our web IDE
The quickest way to create a new serverless function is right from our dashboard with our web-based IDE. Clicking “New Function” drops you right in the IDE with a sample JavaScript function. You'll see four key areas of the function IDE:
- Editor - This is where you edit your code. You'll get event type hinting automatically and can write any Node.js 16.x compatible code.
- Event panel - You can select your event trigger and edit the test event payload
- Actions - You can save a draft of your function, run your function with your test event payload or deploy your function to start handling real data.
- Output panel - When you run your function, it displays the output of your function and any errors that may have been thrown.

Select the event trigger
The most important part of event-driven functions is the event. Specifying the event first allows you to easily write, test, and deploy functions which react to that event. In comparison, often message queue consumers or webhook handlers are designed to branch and handle many event or message types. Selecting a particular event allows our code to be focused and we then know the exact payload that the function will receive.
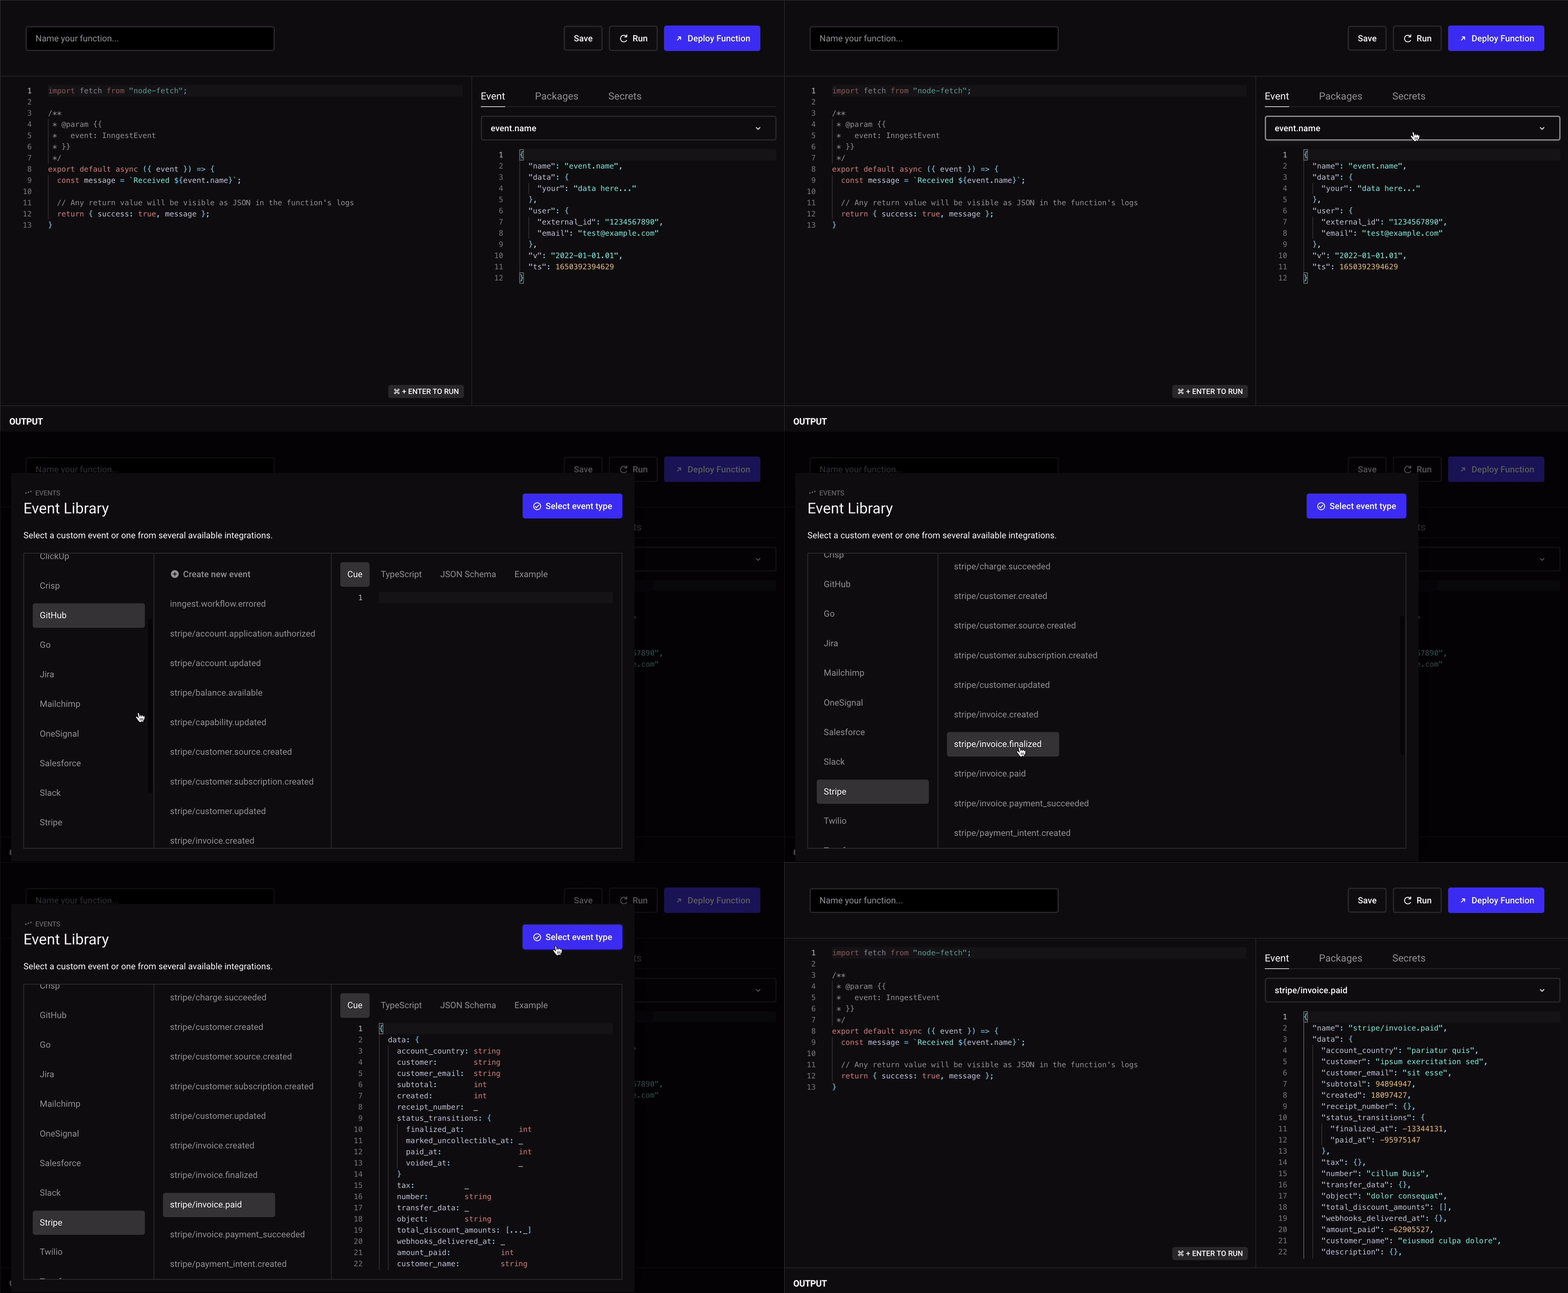
Inngest has a database of many popular event payload schemas and automatically generates a schema for any unknown event. You can view the schema in Cue, TypeScript, or JSON schema. This removes the need for trial and error you may be used to, where you set up new endpoints to inspect payloads before starting work.
Write your code
Our web IDE comes with several included popular packages from npm that you can use: Slack, AWS, Stripe and Twilio SDKs and several others. You can view a list of packages in the "Packages" panel on the right. Additionally, we've included some useful utilities like Axios, node-fetch and lodash. Here we'll use the Slack Web API SDK to send a message to the Slack channel that we want:
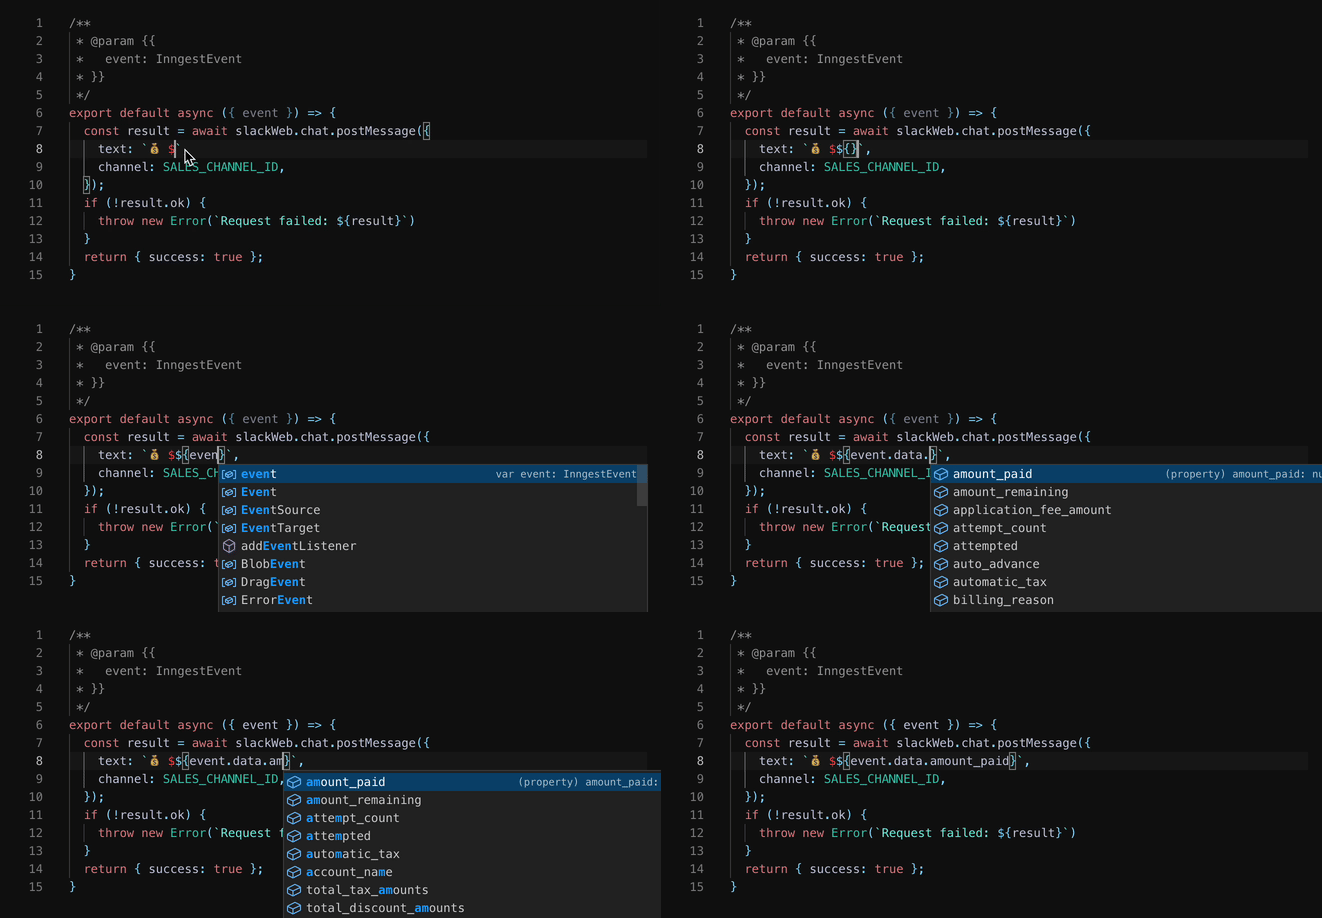
Our final code looks something like this:
jsimport { WebClient } from "@slack/web-api";const slackWeb = new WebClient(process.env.SLACK_ACCESS_TOKEN);const SALES_CHANNEL_ID = "C036L1ZD7PB";/*** @param {{* event: InngestEvent* }}*/export default async ({ event }) => {const result = await slackWeb.chat.postMessage({text: `💰 $${event.data.amount_paid / 100} coming our way from ${event.data.customer_email}`,channel: SALES_CHANNEL_ID,});if (!result.ok) {throw new Error(`Request failed: ${result}`);}return { success: true };};
Run your function with test data
Now you can click the “Run” button at the top of the IDE or hit CMD+Enter on Mac (or Control+Enter on a PC). This saves your code and runs it immediately with the test event payload just like it would run for real world data. The feedback for your code should be instant. Let's see what we got:

Our code failed - not_authed. That's right - we never set the SLACK_ACCESS_TOKEN environment variable. This instant feedback allows us to easily diagnose errors that we would see in production before we release. Let's go and add the environment variable.
Add a secret as an environment variable
All real code that you're shipping to production has secrets. Inngest has a built in secret manager for your account, separated into your test and production environments. Let's say you've already created a Slack app, installed it into your company's workspace and grabbed the Bot User OAuth Token. Now we'll add it to your team's Inngest workspace:
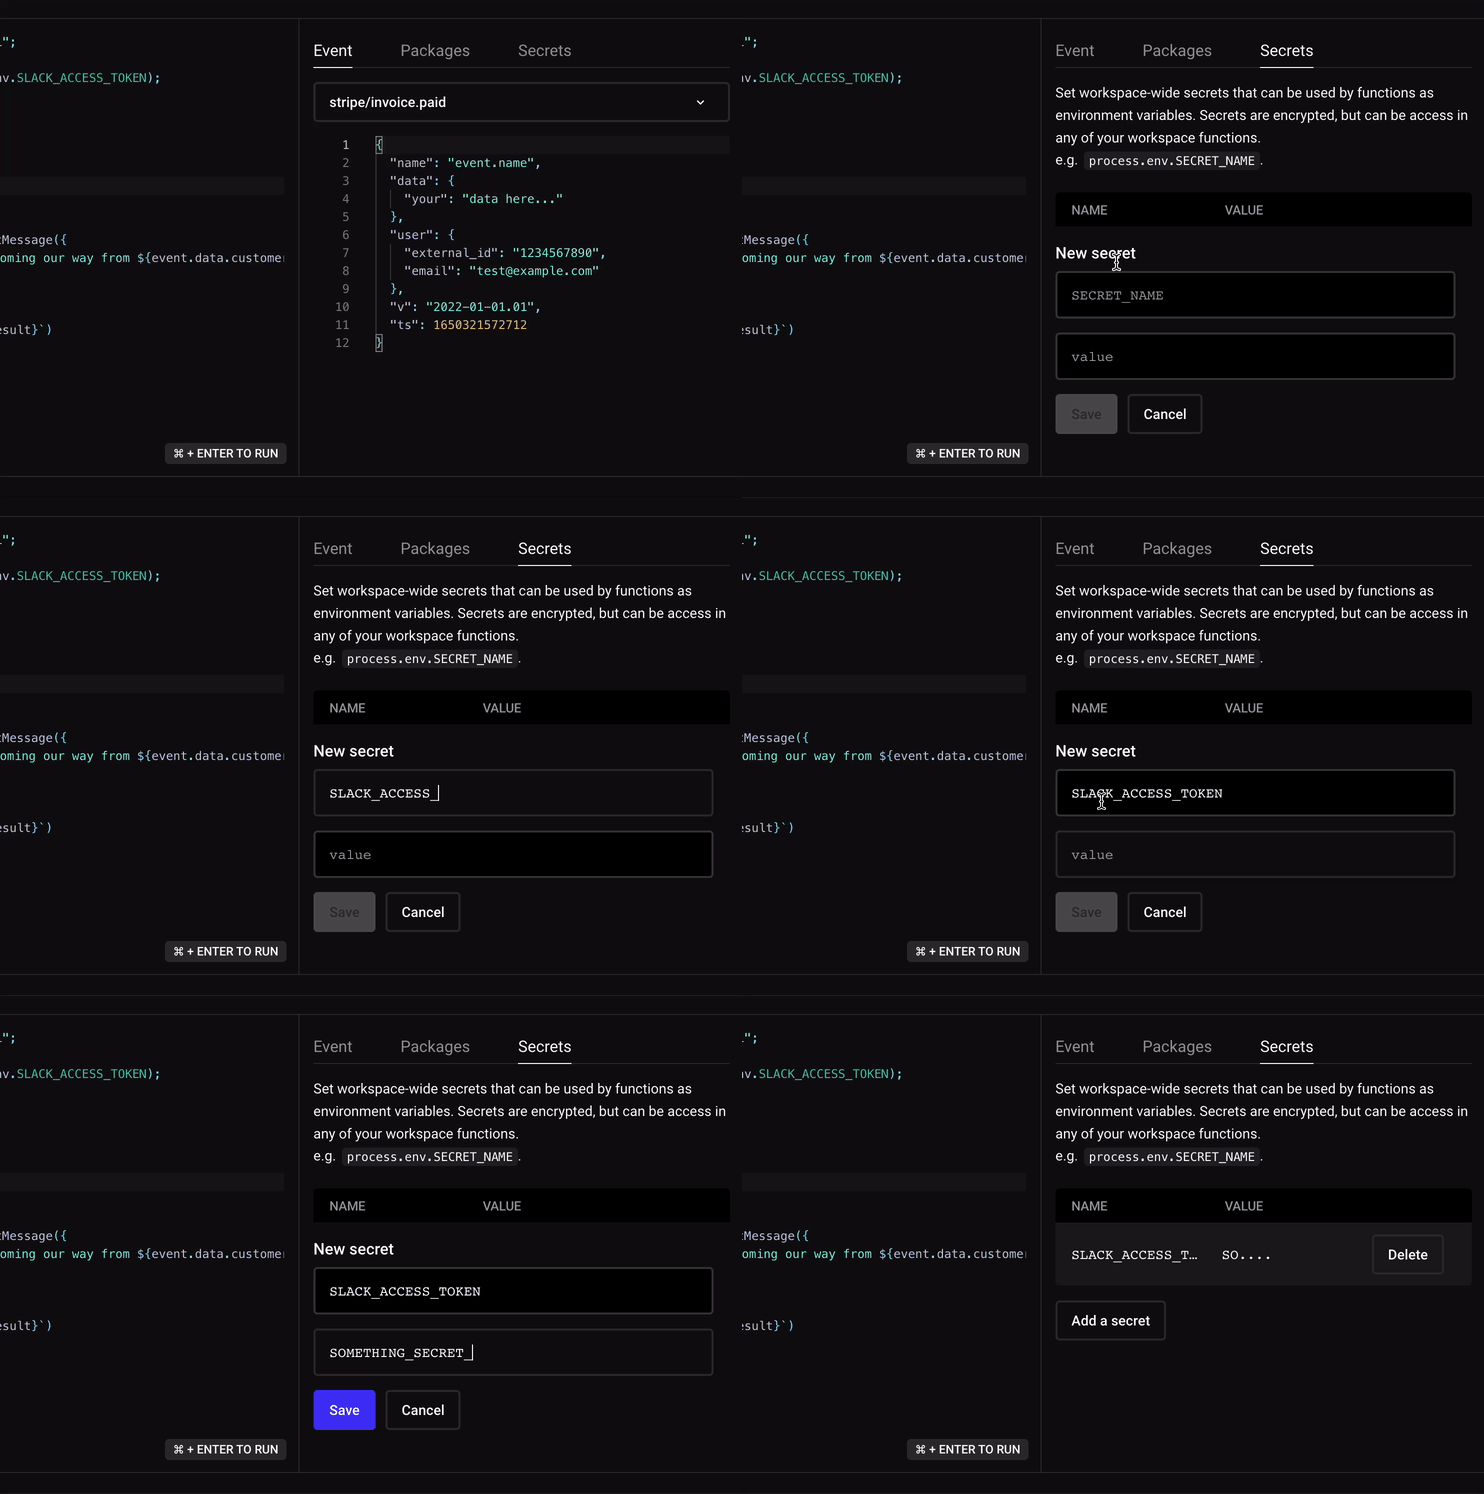
You can also do this from the dashboard Settings page, whichever is more convenient for you.
Ready to test again
Now with our secret added, let's head back to our function and run it again! After running the code we have a new output - { "success": true }. Let's check our company Slack channel:

The IDE generates random data for the given event schema, e.g. strings, integers, booleans, etc. so this data looks really funny. If we want to test with different data, we can edit any of the fields in the JSON in the event panel. Re-run the event to see the function with the new data:
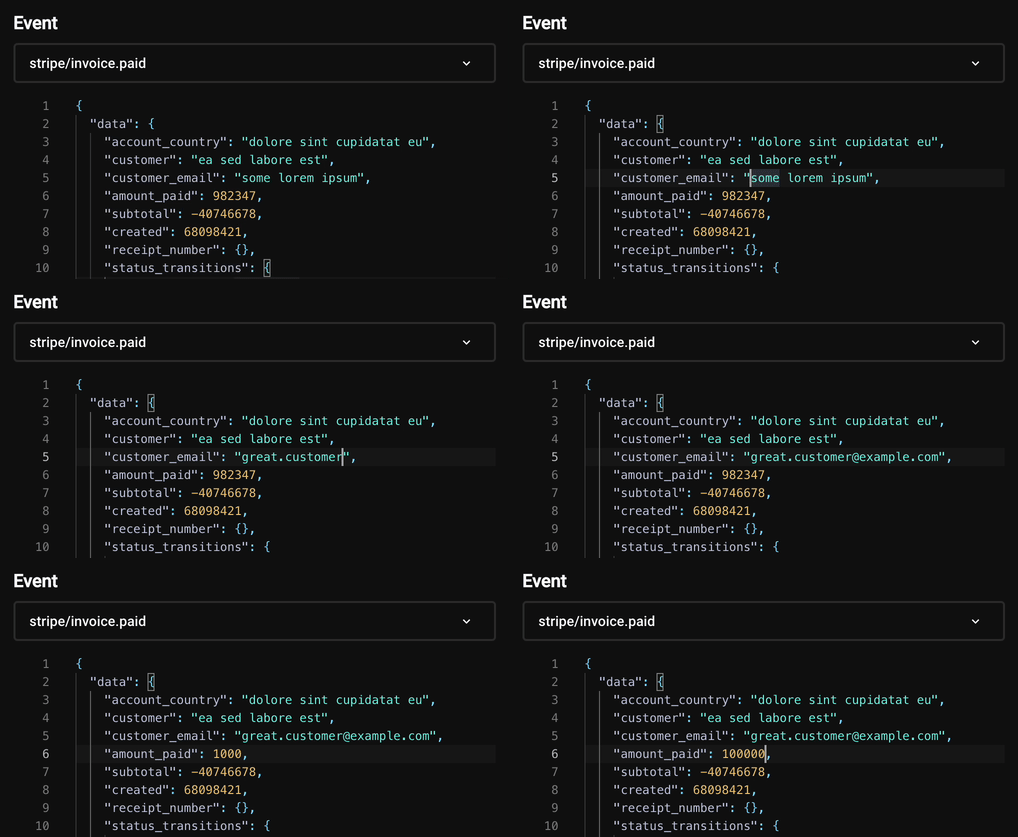
The message with our updated test event payload:

Deploying the function
With our new function tested, we can click the big “Deploy function” button in the top right and that's all. As new stripe/invoice.paid events start flowing in, our function will run instantly!
Monitoring your function
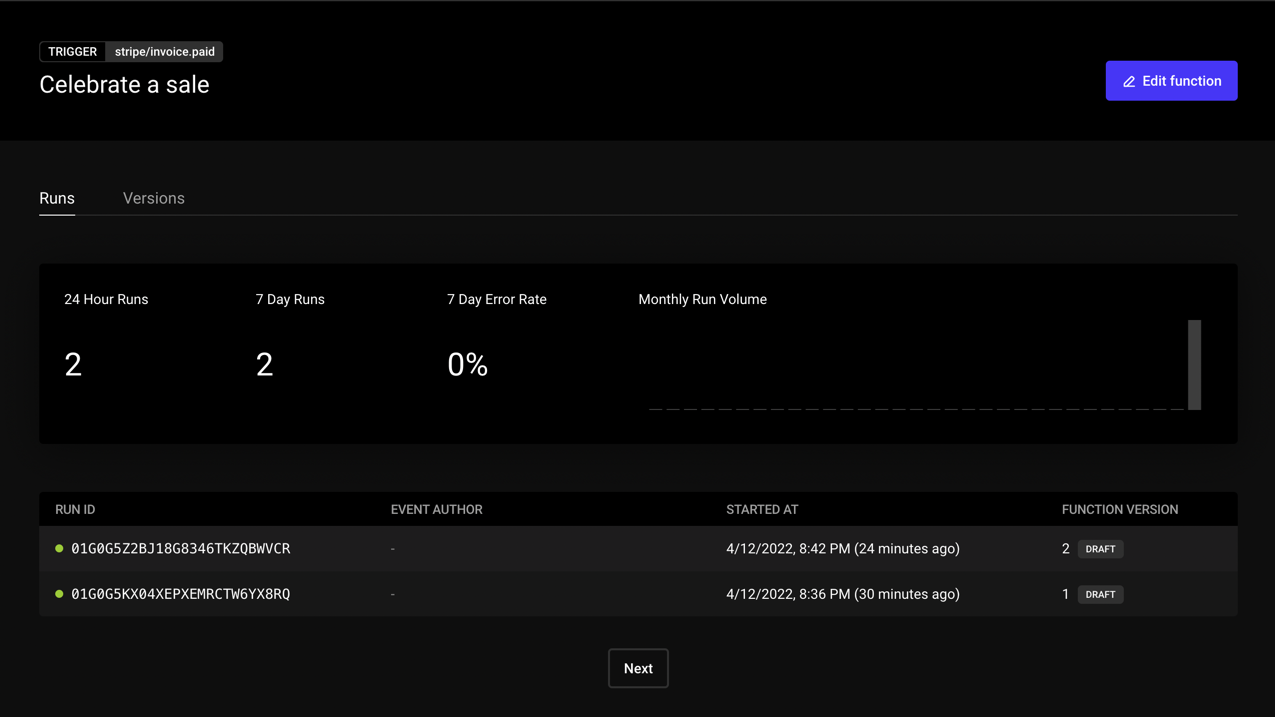
From the Inngest dashboard, you can locate your new function at any time and check on its key metrics like error rate and inspect individual function runs including the event payload that triggered that given run. It's full insight into how your code is running and exactly what event data triggered it.
Now go build something!
Now that you've seen how to quickly deploy a serverless function in minutes, head over to our sign up page and give it a spin. If you'd like to build a function with another language or use your own code editor, go check out our getting started guide with our brand new cli - you can do everything that we did above on your own machine.
PS - If you've checked this post and Inngest out - we'd love to hear your feedback and questions over in our Discord community or by clicking the “Feedback” button on the top right of the dashboard.